Epic Mini Cheesecake Board: Create a Stunning Dessert Platter 🍰✨🎉
1. Introduction
Welcome to the ultimate guide on crafting an epic mini cheesecake board that will impress guests and elevate any celebration. Whether you are planning a birthday party, bridal shower, or simply want to indulge in a delectable treat, a mini cheesecake board offers an attractive, customizable, and no-bake dessert option that is sure to be a hit. This comprehensive guide will walk you through every step needed to create stunning dessert charcuterie board ideas featuring no-bake cheesecake bites, which are as visually appealing as they are incredibly delicious. Discover how to craft a perfect cheesecake platter that combines variety, flavor, and presentation, making your dessert table unforgettable.
2. Why Choose a Mini Cheesecake Board?
Building a cheesecake platter ideas around a mini cheesecake board offers many benefits. These boards are incredibly easy to prepare, require no baking, and can be customized with your favorite toppings and accompaniments. Because of their individual portions, no-bake cheesecake bites provide a delightful, mess-free way to serve dessert at parties. They create a sophisticated, eye-catching centerpiece that blends elegance with flavor, making them an ideal choice for both casual gatherings and fancy celebrations. Plus, exploring different dessert charcuterie board ideas can inspire your creativity and impress your guests with minimal effort.
3. Ingredients for Your Stunning Cheesecake Platter
- Mini graham cracker crusts, cookies, or biscuit bases for the foundation
- Softened cream cheese for rich, smooth texture
- Sugar and vanilla extract to enhance flavor
- Heavy cream or Greek yogurt for added creaminess
- Assorted fresh toppings: berries, sliced fruits, fruit preserves, chocolate chips, crushed cookies, chopped nuts
- Optional garnishes: fresh mint, edible flowers, caramel sauce, chocolate drizzle
- Variety of crackers, cookies, and sliced fruits for serving and pairing
These carefully selected ingredients help you craft a versatile and visually stunning dessert charcuterie board that’s perfect for any occasion, impresses with flavor, and looks irresistibly appealing.
4. Step-by-Step Guide to Making Your Mini Cheesecake Board
Preparing the No-Bake Cheesecake Bites
- In a mixing bowl, combine softened cream cheese, sugar, and vanilla extract. Beat until smooth and creamy.
- In a separate bowl, whip heavy cream or Greek yogurt until stiff peaks form.
- Gently fold the whipped cream into the cream cheese mixture until well incorporated, creating a fluffy filling.
- Spoon the mixture into mini crusts or shape into small balls. Refrigerate for at least 2 hours or until set and firm.
Arranging the Cheesecake Platter
Lay out a large, decorative platter or board. Place the no-bake cheesecake bites in the center. Surround with vibrant fresh fruits, sweet toppings, crunchy cookies, and crackers. Incorporate small bowls filled with fruit preserves, caramel, or chocolate sauce for dipping, offering a variety of flavor combinations. The arrangement should be colorful and inviting, encouraging guests to indulge.
Adding Toppings and Garnishes
Enhance your cheesecake platter ideas by decorating with colorful berries, chopped nuts, and edible flowers for visual appeal. Drizzle with decadent chocolate or caramel sauce to add flavor depth and a professional touch. Use Ninja SLUSHi Pro RapidChill Drink Maker to keep beverages chilled and chilled drinks paired perfectly with your dessert, elevating the overall experience.
5. Storage Tips to Keep Your Cheesecake Board Fresh
Cover your mini cheesecake board with plastic wrap and refrigerate if serving later. For best results, enjoy within 24 hours to maintain freshness and flavor integrity. Keep toppings—such as whipped cream, fresh berries, and sauces—separate until just before serving to prevent sogginess and preserve the presentation’s perfection. For easy preparation and storage, consider using a JoyJolt Airtight Glass Food Storage Set.
6. Serving Suggestions for a Show-stopping Dessert Platter
Position your cheesecake platter ideas prominently on a dessert table or serving station. Arrange small utensils, napkins, and complementary drinks such as coffee or sparkling wine nearby to create a festive atmosphere. Make each guest feel special by offering an interactive experience with various toppings and bites—perfect for celebrations and parties. For efficient serving, equipment like the CAROTE Premium 16pc Nonstick Cookware Set can help prepare additional treats effortlessly.
7. Variations and Creative Twists
- Incorporate flavored cream cheeses such as lemon, strawberry, or cookies and cream to diversify your cheesecake bites.
- Create themed toppings for holidays—think pumpkin puree with cinnamon in fall or peppermint for winter festivities.
- Use elegant or disposable trays to enhance visual appeal and ease cleanup, like the KitchenAid Classic Iconic Stand Mixer for mixing larger batches of fillings.
These creative approaches and personalized twists make your mini cheesecake board a memorable centerpiece that caters to all tastes and occasions.
8. Frequently Asked Questions (FAQs)
How do I make no-bake cheesecake bites for my cheesecake platter?
To prepare no-bake cheesecake bites, blend softened cream cheese, sugar, and vanilla until smooth. Fold in whipped cream or Greek yogurt for extra creaminess. Shape into small balls or fill mini crusts, then refrigerate until firm, about 2 hours. These bites are perfect for quick assembly and serve as a delightful addition to any mini cheesecake board.
What are some great mini cheesecake board ideas for parties?
Opt for a variety of vibrant toppings, including fresh berries, chocolate chips, crushed cookies, and sliced fruits. Include a selection of crackers and cookies to complement the cheesecake bites. Incorporate colorful garnishes and drizzle sauces for an appealing presentation that encourages mingling and tasting.
How can I keep my cheesecake platter fresh for longer?
Keep the dessert platter covered with plastic wrap and refrigerated until ready to serve. Add delicate toppings such as whipped cream, fresh fruit, or sauces just before presentation to prevent sogginess. Using sturdy, airtight containers like the JoyJolt Food Storage Set can help maintain freshness during storage.
9. Conclusion
Creating a stunning mini cheesecake board is an excellent way to impress guests with minimal effort. By combining flavorful, no-bake cheesecake bites with a colorful assortment of toppings, fruits, and accompaniments, you can craft an elegant and delectable dessert charcuterie board that will serve as a beautiful centerpiece. Experiment with various flavors and presentation styles, and don’t forget to add some creative personal touches to make your cheesecake platter ideas truly unique. Enjoy the process and indulge in the irresistible sweetness of your homemade mini cheesecakes—your guests will thank you!
Print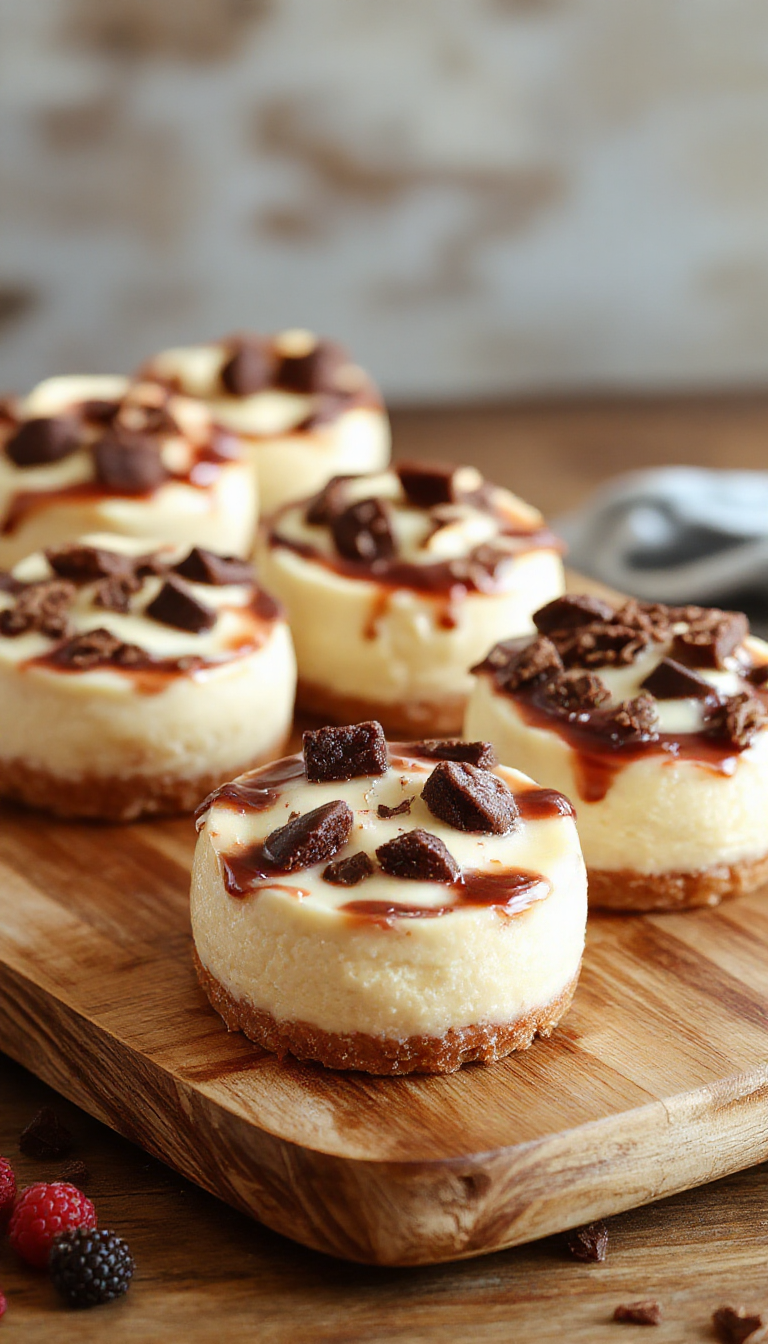
Epic Mini Cheesecake Board: Create a Stunning Dessert Platter
Create an eye-catching and delectable mini cheesecake board with our step-by-step guide. Perfect for parties and celebrations, this no-bake dessert platter combines rich, creamy cheesecake bites with fresh toppings and colorful presentation. Impress your guests with an elegant, customizable, and easy-to-make dessert centerpiece that elevates any event.
- Total Time: 2 hours 15 mins
- Yield: 10-12 servings
Ingredients
- Mini graham cracker crusts or cookies for the base
- Cream cheese, softened
- Sugar and vanilla extract for flavor
- Heavy cream or Greek yogurt for creaminess
- Assorted toppings: fresh berries, fruit preserves, chocolate chips, crushed cookies, nuts
- Optional garnishes: mint leaves, edible flowers, caramel or chocolate sauce
- Variety of crackers, cookies, and fruit slices for serving
Instructions
- In a mixing bowl, beat together softened cream cheese, sugar, and vanilla until smooth.
- In a separate bowl, whip heavy cream or Greek yogurt until stiff peaks form.
- Gently fold the whipped cream into the cream cheese mixture until well combined.
- Spoon the mixture into mini crusts or mold into small balls and refrigerate for at least 2 hours.
- Lay out a large platter or board. Place the no-bake cheesecake bites in the center.
- Surround with an array of fresh fruits, toppings, and cookies or crackers. Add small bowls of fruit preserves or caramel for dipping.
- Decorate with colorful berries, chopped nuts, and edible flowers. Drizzle with chocolate or caramel sauce for extra flair.
Notes
- Ensure cream cheese is softened for easier mixing.
- Refrigerate the cheesecake bites for at least 2 hours to set properly.
- Arrange toppings and garnishes just before serving to keep everything fresh and appealing.
- Prep Time: 15 mins
- Cook Time: 0 mins
- Category: Dessert
- Method: No-Bake
- Cuisine: American
- Diet: Vegetarian
Nutrition
- Serving Size: 1 slice or 1 mini cheesecake bite
- Calories: 150 Kcal
- Sugar: 10g
- Sodium: 70mg
- Fat: 11g
- Saturated Fat: 6g
- Unsaturated Fat: 4g
- Trans Fat: 0g
- Carbohydrates: 12g
- Fiber: 1g
- Protein: 3g
- Cholesterol: 25mg
1 thought on “Epic Mini Cheesecake Board: Create a Stunning Dessert Platter”